
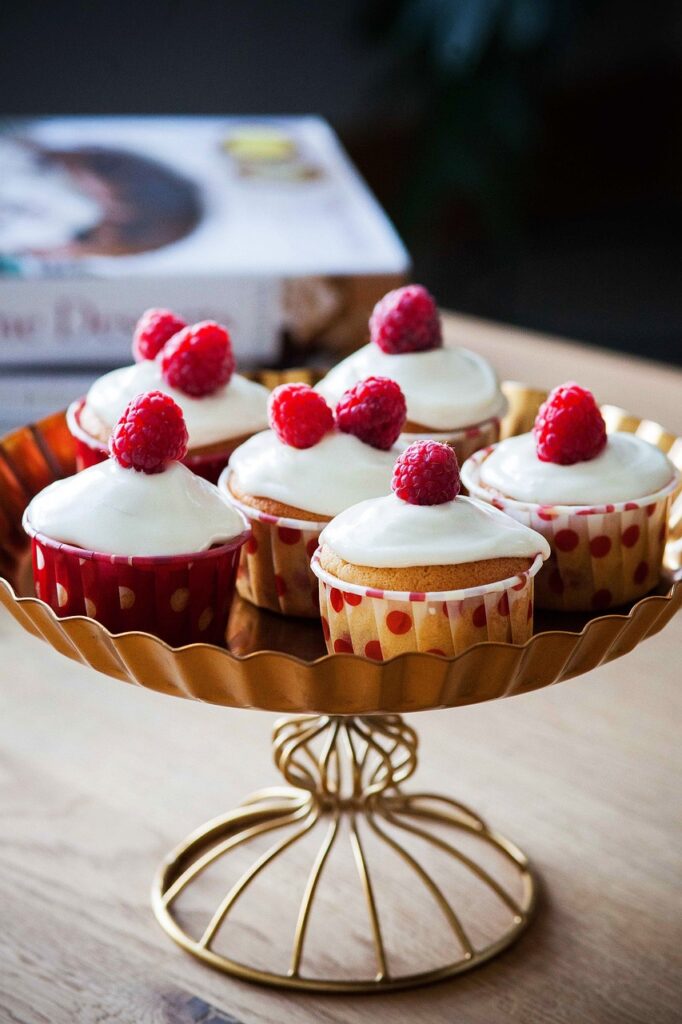
Here’s a full, reader-friendly blog post you can use under that title—clear, practical, and perfect for beginners or home bakers. 🧁
Cupcake Basics: How to Get Moist, Fluffy Cupcakes Every Time
There’s nothing sadder than a dry, dense cupcake. The good news? Moist, fluffy cupcakes aren’t a mystery—they’re the result of a few simple techniques done right. Whether you’re baking for a party or just a weekday treat, these cupcake basics will help you nail perfect results every single time.
Start with Room-Temperature Ingredients
One of the most overlooked steps in baking is using room-temperature ingredients—but it makes a huge difference in how your cupcakes turn out. When ingredients are at the right temperature, they combine more evenly, trap air properly, and create a smooth batter that bakes into light, fluffy cupcakes.
Why Room Temperature Matters
Room-temperature ingredients emulsify better. That means fats and liquids blend smoothly instead of separating or clumping. When butter and sugar are creamed together properly, they create tiny air pockets that expand in the oven, giving cupcakes their soft, tender crumb.
Cold ingredients—especially butter and eggs—can cause:
- Lumpy or curdled batter
- Uneven mixing
- Dense, heavy cupcakes
Simply letting ingredients warm up prevents these issues before they start.
Which Ingredients Should Be Room Temperature?
For most cupcake recipes, the following ingredients should be at room temperature:
- Butter (soft but not melted)
- Eggs
- Milk, buttermilk, or yogurt
- Cream cheese or sour cream
A good rule of thumb: if it normally lives in the fridge, check the recipe to see if it should be brought to room temperature first.
What “Room Temperature” Actually Means
Room temperature doesn’t mean warm—it means around 65–70°F (18–21°C). Butter should be soft enough to press with a finger but still hold its shape. Eggs should no longer feel cold to the touch.
Shortcuts When You’re in a Hurry
Forgot to plan ahead? No problem.
- Place eggs in a bowl of warm (not hot) water for 5–10 minutes
- Cut butter into small cubes to soften faster
- Microwave butter in very short bursts (5 seconds at a time) without melting
Avoid fully melting butter unless the recipe specifically calls for it—it changes the texture of the cupcakes.
Measure Ingredients Correctly
Too much flour is one of the biggest cupcake killers. It makes cupcakes dense and dry.
- Spoon flour into your measuring cup and level it off
- Don’t scoop directly from the bag
- Even better: use a kitchen scale for accuracy
Baking is science—precision matters.
Don’t Overmix the Batter
When it comes to cupcakes, more mixing does not mean better results. Overmixing the batter is one of the most common reasons cupcakes turn out dense, tough, or rubbery instead of light and fluffy.
What Happens When You Overmix
Flour contains proteins that form gluten when mixed with liquid. A little gluten is necessary for structure, but too much makes cupcakes chewy—great for bread, not so great for dessert.
Overmixing can lead to:
- Dense, heavy cupcakes
- Tough or chewy texture
- Cupcakes that rise unevenly or sink in the middle
The goal is a tender crumb, not a workout for your mixer.
When Overmixing Usually Happens
Most overmixing occurs after the dry ingredients are added. Once flour hits the batter, mixing should be gentle and brief.
Common mistakes include:
- Beating the batter on high speed
- Trying to make the batter perfectly smooth
- Letting the mixer run while multitasking
A few small lumps are completely fine and will disappear during baking.
How to Mix the Batter Correctly
- Mix wet ingredients thoroughly first
- Add dry ingredients in batches
- Use a low speed or mix by hand
- Stop as soon as the flour is incorporated
A spatula is often your best tool for the final few folds.
Visual Cue: What Proper Batter Looks Like
Properly mixed cupcake batter should be:
- Smooth but not glossy
- Slightly thick
- Free of large pockets of dry flour
If it looks elastic or overly shiny, it’s probably been overmixed.
Hand Mixing vs. Electric Mixers
Electric mixers are convenient, but they make it easy to go too far. For small batches or delicate batters, mixing by hand gives you more control and reduces the risk of overmixing.
Use the Right Fat
Fat plays a major role in how your cupcakes taste and feel. It affects moisture, tenderness, and flavor, so choosing the right type—and using it correctly—can make the difference between a dry cupcake and one that’s rich, soft, and irresistible.
Why Fat Matters in Cupcakes
Fat coats flour proteins, limiting gluten development and helping create a tender crumb. It also traps air during mixing, which contributes to lift and lightness. Without enough fat, cupcakes can turn out dry, crumbly, or dense.
Butter vs. Oil: What’s the Difference?
Both butter and oil are common in cupcake recipes, but they behave very differently.
Butter
- Adds rich, classic flavor
- Helps with structure and aeration when creamed with sugar
- Produces a slightly firmer crumb
Oil
- Creates ultra-moist, soft cupcakes
- Stays liquid at room temperature, keeping cupcakes tender longer
- Has a neutral flavor (depending on the oil)
Butter brings flavor; oil brings moisture.
The Best of Both Worlds
Many bakers use a combination of butter and oil to get the advantages of both—great flavor and lasting moisture. This is especially useful for cupcakes that need to stay soft for a day or two, like party or event bakes.
Choosing the Right Oil
If a recipe calls for oil, stick to neutral options such as:
- Vegetable oil
- Canola oil
- Light olive oil (not extra virgin)
Strong-flavored oils can overpower delicate cupcake flavors.
Watch the Temperature
Butter should be room temperature, not melted, unless the recipe specifies otherwise. Melted butter changes how the batter emulsifies and can lead to greasy or dense cupcakes.
Adjusting Fat for Flavor Profiles
- Vanilla or chocolate cupcakes benefit from butter’s richness
- Citrus or spice cupcakes often shine with oil-based moisture
- Red velvet and carrot cupcakes are traditionally oil-based for softness
Matching the fat to the flavor enhances the final result.
Add Moisture Boosters
Even with the right fat, overbaking, or a little misstep in mixing can leave cupcakes dry. That’s where moisture boosters come in—they’re ingredients that keep cupcakes soft, tender, and irresistibly fluffy, often while adding subtle flavor or richness.
Why Moisture Boosters Matter
Moisture boosters work by adding extra liquid, fat, or both to the batter. They help:
- Prevent dryness
- Create a tender crumb
- Keep cupcakes soft for longer
- Enhance flavor and richness
Without them, even a perfectly baked cupcake can feel heavy or dry after a day or two.
Common Moisture Boosters
1. Sour Cream or Greek Yogurt
- Adds tangy flavor and richness
- Creates a tender, moist texture
- Works especially well in chocolate, vanilla, and spice cupcakes
2. Buttermilk
- Its acidity reacts with baking soda or powder for extra lift
- Adds a subtle tang that balances sweetness
- Keeps cupcakes soft and light
3. Applesauce
- Reduces the need for extra butter or oil while keeping moisture
- Great for healthier or lower-fat cupcakes
- Works well in spice, carrot, or banana-flavored cupcakes
4. Oil or Melted Butter
- Adds more liquid fat than solid butter alone
- Oil stays liquid at room temperature, keeping cupcakes tender longer
5. Milk or Cream
- Simple but effective for extra hydration
- Helps dissolve sugar and blend flavors evenly
Tips for Using Moisture Boosters
- Replace a portion of fat or liquid with your chosen booster according to the recipe. Too much can alter texture or cause sinking.
- Match the booster to the flavor of the cupcake—applesauce works great in spiced or fruity flavors, while sour cream is perfect for rich chocolate or classic vanilla.
- Don’t skip this step for cupcakes that need to stay soft for parties or events—they make a noticeable difference even after a day or two.
Bonus Tip: Liquid Sweeteners
Honey, maple syrup, or agave nectar can also act as moisture boosters because they hold water in the batter. Just reduce other liquids slightly to balance the texture.
Don’t Overfill the Liners
One of the simplest mistakes in cupcake baking is overfilling the liners. It might seem harmless, but filling them too full can drastically affect both the look and texture of your cupcakes.
Why Overfilling is a Problem
When cupcake liners are overfilled, several issues can occur:
- Overflowing Batter: Cupcakes can spill over the edges of the liner, creating uneven, messy tops.
- Uneven Baking: The center may stay undercooked while the edges brown too quickly.
- Misshapen Cupcakes: Instead of a neat dome, you may get flat, collapsed, or lopsided cupcakes.
On the other hand, underfilling liners can lead to tiny, dry cupcakes that don’t rise properly.
The Ideal Fill Level
The general rule is to fill each liner about ⅔ full. This gives the cupcakes enough space to rise and form a perfect dome without overflowing.
Visual Guide:
- ⅓ full → small, flat cupcakes
- ½ full → slightly taller cupcakes, may rise nicely
- ⅔ full → perfect dome with balanced baking
- ¾–full → risky, likely overflow
Tips for Perfectly Filled Liners
- Use a Scoop: A standard cookie or ice cream scoop ensures consistent portions for each cupcake.
- Measure Carefully: Even a tablespoon difference can affect rise and shape.
- Check Your Pan Size: Cupcake liners come in standard, mini, and jumbo sizes. Adjust the fill level according to the liner type:
- Mini: fill about ½ full
- Standard: fill ⅔ full
- Jumbo: fill ½ to ⅔ full, depending on recipe
- Leave Room for Air: Cupcakes need space to expand; overfilled liners trap batter against the pan and cause uneven baking.
Bake at the Right Temperature
Baking cupcakes might seem as simple as “pop them in the oven,” but the temperature you bake at has a huge impact on texture, rise, and evenness. Even a small difference—just 10–20°F—can turn fluffy cupcakes into dense or dry ones.
Why Temperature Matters
Oven temperature affects how cupcakes rise and set:
- Too hot: The outside sets too quickly, while the inside remains undercooked. Tops may crack or domes may be exaggerated.
- Too low: Cupcakes may bake unevenly, resulting in a flat, dense texture. They can also dry out if baked for too long.
The perfect temperature ensures the batter rises evenly, sets properly, and stays moist.
The Standard Temperature
Most cupcakes bake best at 350°F (175°C). This temperature allows:
- Gradual, even rise
- Light, tender crumb
- Proper browning without burning
Some recipes, like very delicate sponge or chocolate cupcakes, may call for slightly lower temperatures (325–340°F), while quick, dense cupcakes may go slightly higher (360–375°F). Always check the recipe first.
Tips for Baking at the Right Temperature
- Use an Oven Thermometer: Most ovens are off by 10–25°F, so a thermometer ensures accuracy.
- Avoid Opening the Oven Door Early: Every peek lets heat escape and can cause cupcakes to sink.
- Position Your Pan Correctly: Center the rack for even heat distribution.
- Adjust for Dark or Light Pans: Dark pans absorb more heat and can brown cupcakes faster; lower the temperature by 10–15°F if needed.
How to Know They’re Done
Baking time varies depending on pan size and batter. Cupcakes are done when:
- A toothpick inserted in the center comes out clean or with a few moist crumbs
- Tops spring back when lightly pressed
Overbaking—even by a minute or two—can dry them out, so start checking a few minutes before the recipe suggests.
Check for Doneness the Right Way
Baking cupcakes perfectly is more than just timing the oven—it’s about knowing exactly when they’re done. Even a minute too long can dry them out, while underbaking leaves them gooey in the center. Learning how to check for doneness ensures your cupcakes come out soft, moist, and bakery-worthy every time.
Why Timing Alone Isn’t Enough
Recipes often give a range, like “bake for 18–22 minutes,” but oven temperatures vary and pan size affects baking. Checking visually and physically ensures your cupcakes are ready without overbaking.
Methods to Check Doneness
1. Toothpick Test
- Insert a toothpick or skewer into the center of the cupcake.
- If it comes out clean or with a few moist crumbs, the cupcake is done.
- If batter sticks to the toothpick, it needs more time.
2. Touch Test
- Gently press the top of the cupcake with your finger.
- If it springs back, it’s ready.
- If it leaves an indentation, bake a little longer.
3. Visual Cues
- Tops should be lightly golden (or according to flavor, e.g., chocolate will be darker).
- Cupcakes may slightly pull away from the edges of the liner.
- Cracks on the top are normal for some recipes, but large or deep cracks may indicate overbaking.
Timing Tips
- Start checking 2–3 minutes before the recipe’s minimum bake time.
- Mini cupcakes usually take less time (around 10–15 minutes).
- Jumbo cupcakes take longer (up to 30–35 minutes).
- Always rotate the pan halfway through baking if your oven has hot spots.
Avoid Common Mistakes
- Don’t rely only on the clock: Baking times are guidelines, not guarantees.
- Don’t open the oven repeatedly: Too many peeks can cause sinking.
- Don’t assume appearance equals doneness: Color can vary depending on flavor or pan type.
Cool Properly Before Frosting
One of the most overlooked steps in cupcake baking is cooling your cupcakes properly before frosting. Skipping or rushing this step can turn your beautifully baked cupcakes into a frosting disaster—melting, sliding, or soggy treats.
Why Cooling Matters
Cupcakes continue cooking slightly after being removed from the oven. If you frost them while they’re still warm:
- The frosting will melt or slide off
- Cupcake tops may sink under the weight
- You risk creating moisture condensation, making the cupcakes soggy
Proper cooling preserves both the texture of the cupcake and the appearance of the frosting.
How to Cool Cupcakes Correctly
1. Cool in the Pan First (5–10 Minutes)
- Let cupcakes sit in the pan for a few minutes to firm up.
- This helps them hold their shape when transferred to a cooling rack.
2. Transfer to a Wire Rack
- Remove cupcakes from the pan and place them on a wire cooling rack.
- Elevating them allows air to circulate around the cupcakes, preventing the bottoms from getting soggy.
3. Wait Until Completely Cool
- Frosting warm cupcakes can lead to melting or sliding.
- Depending on size:
- Mini cupcakes: ~20–25 minutes
- Standard cupcakes: ~30–40 minutes
- Jumbo cupcakes: ~45–60 minutes
4. Optional: Chill Briefly
- If your frosting is particularly soft (like whipped cream or cream cheese), a 5–10 minute chill in the fridge can help it hold shape better.
Quick Tips for Perfect Frosting
- Test by gently touching the top—if it feels room temperature, it’s ready.
- Avoid stacking cupcakes before frosting; cooling must be complete to prevent sweating.
- For buttercream, slightly chilled cupcakes can actually make piping easier, giving clean, sharp swirls.
Store Them Correctly
Baking perfect cupcakes is only half the battle—storing them properly is what keeps them soft, moist, and delicious until they’re ready to eat. Improper storage can turn a fluffy, tender cupcake into a dry, crumbly disappointment in just a day or two.
Why Storage Matters
Cupcakes are delicate baked goods that lose moisture quickly. Factors like air exposure, temperature, and humidity all affect their texture and freshness. Proper storage helps:
- Maintain moisture
- Prevent the frosting from melting or becoming sticky
- Preserve flavor and aroma
- Extend shelf life
Storing Unfrosted Cupcakes
Room Temperature
- Store in an airtight container for up to 2 days.
- Keep away from direct sunlight or heat sources.
Freezing
- Wrap cupcakes individually in plastic wrap or aluminum foil.
- Place in a freezer-safe container or bag for up to 3 months.
- Thaw at room temperature before frosting or serving.
Storing Frosted Cupcakes
Buttercream Frosting
- Can usually stay at room temperature for 1–2 days in an airtight container.
- Avoid refrigeration unless your kitchen is very warm; it can dry the cupcake.
Cream Cheese, Whipped Cream, or Custard-Based Frostings
- Must be stored in the refrigerator.
- Keep cupcakes in a sealed container to prevent drying out or absorbing fridge odors.
- Bring to room temperature before serving for best flavor and texture.
Tips for Keeping Cupcakes Fresh
- Avoid stacking: Stacking frosted cupcakes can smush decorations and frosting.
- Use a cupcake carrier for transport or storage—it keeps cupcakes upright and prevents damage.
- Don’t frost too early if you plan to store for more than a day. Frosting closer to serving time keeps the cupcakes fresh.
Final Thought
Perfect cupcakes aren’t about fancy tools or secret ingredients—they’re about mastering the basics. Once you’ve got these tips down, you’ll get moist, fluffy cupcakes every time, no stress required.